
 By
When you spend months or years anchored to an office chair, a car seat, or a couch, your body adapts ruthlessly to the posture it occupies most. The hip flexors lock into a shortened state, the gluteal muscles fall into functional dormancy, and the deep, stabilizing musculature of your midsection goes offline. When people finally decide to break free from this physical slump, their immediate instinct is often to drop to the living room floor and grind out sets of sit-ups, bicycle crunches, or trembling two-minute elbow planks.
Within days, this approach usually ends the same way: an aching lower back, strained neck flexors, and deep frustration.
Rebuilding genuine core strength after a prolonged sedentary period requires an entirely different philosophy. Your core is not an ornament designed to flex your spine forward a thousand times a day. It is an intricate, three-dimensional suspension system engineered to transfer force, protect your spinal cord, and stabilize your entire skeleton against gravity. Restoring it requires patient neuromuscular re-education, intentional breathing mechanics, and targeted stability work before you ever consider dynamic movement.
The Biomechanical Toll of Prolonged Sitting
To fix a compromised midsection, you must first understand the structural shifts that happen during prolonged inactivity. The human body is exceptionally economical; it stops expending neurological energy on tissues you do not use. When you sit for eight to ten hours a day, several predictable physiological compensations take place simultaneously.
First, your pelvis tilts forward into what specialists call an anterior pelvic tilt. Because the psoas and iliacus muscles at the front of your hips remain contracted in a seated position, they tighten and pull downward on the front of your pelvic rim. This movement arches the lower back, compresses the lumbar facet joints, and stretches the abdominal wall into a chronically slackened, mechanically disadvantaged state.
Second, the brain downregulates its communication with your gluteal muscles—a phenomenon frequently described as gluteal amnesia. When your primary hip extensors fail to fire, your lower back muscles and hamstrings are forced to take on heavy stabilizing duties they were never designed to manage.
Finally, your primary breathing muscle, the diaphragm, gets compressed. Slumping in a chair restricts the ribcage and forces you into shallow chest breathing. This single change robs your torso of its internal hydraulic support system, leaving your lumbar spine vulnerable to shear forces the moment you stand up or lift a bag of groceries.
Redefining the Core: The Canister Model
Most fitness marketing portrays the core as the rectus abdominis—the visible “six-pack” running down the front of the belly. In functional reality, the rectus abdominis is merely the superficial exterior layer.
Think of your true functional core as a pressurized cylinder or canister:
-
The diaphragm forms the top lid of the cylinder.
-
The pelvic floor forms the structural base.
-
The transverse abdominis wraps completely around your midsection like a wide, deep corset.
-
The multifidus and deeper spinal stabilizers line the back of the cylinder along each vertebra.
-
The internal and external obliques crisscross the sides, controlling rotation and lateral stability.
When every element of this canister functions synchronously, it creates intra-abdominal pressure. This internal air pressure acts like a natural weight belt, bracing the spine from the inside out. When you have been sedentary, this pressure mechanism fails. Rebuilding core strength is not about making your abdominal wall hard to the touch; it is about restoring the automatic, pressurized support of this deep muscular cylinder.
Phase 1: Re-establishing the Neuromuscular Foundation Through Breath
The first stage of rebuilding a dormant midsection does not involve sweat, heavy resistance, or complex calisthenics. It focuses entirely on restoring the connection between your brain, your diaphragm, and your deep abdominal wall.
360-Degree Diaphragmatic Breathing
Before you can stabilize your spine, you must learn how to breathe down into your pelvic basin again. Shallow chest breathing elevates stress hormones and leaves the abdominal wall disengaged.
Lie on your back on a firm mat with your knees bent and feet flat on the floor, about hip-width apart. Place one hand on your lower abdomen and the other along the side of your lower ribcage. Inhale slowly through your nose for a count of four seconds. Direct the air deep into your lower torso, feeling your belly, your sides, and even your lower back expand gently outward against the floor.
Your upper chest and shoulders should remain quiet and relaxed. Pause for a second at the top of the breath, then exhale smoothly through pursed lips for six seconds, feeling your ribcage glide downward and your abdominal wall naturally draw inward. Performing ten deliberate cycles of this breath daily recalibrates the diaphragm and restores baseline intra-abdominal mechanics.
The Art of the Abdominal Brace
Once you can direct your breath into the lower cylinder, you must learn how to brace without holding your breath or pulling your stomach in.
Many people mistakenly practice “stomach hollowing,” sucking their belly button toward their spine. While this recruits the transverse abdominis to some extent, it dramatically reduces your base of support and leaves your lumbar spine less stable under external load.
Instead, practice the abdominal brace. Imagine someone is about to lightly drop a small medicine ball onto your stomach. You do not suck your stomach in; you stiffen the entire cylinder outward in every direction. Place your fingers on your sides, right above your hip bones, and gently push into the flesh. Inhale, and as you exhale, create a firm, 360-degree muscular barrier that pushes back against your fingers. Practice maintaining this firm tension while continuing to take shallow, controlled breaths. This dissociation—bracing your structure while still breathing—is the cornerstone of spinal stability.
Phase 2: Mastering Anti-Movement Foundations
The primary functional purpose of the core is not to produce motion; it is to resist motion. When walking, running, carrying objects, or reaching overhead, your midsection acts as an isometric stabilizer that prevents unwanted spinal twisting, bending, and shearing.
When transitioning out of a sedentary state, traditional spinal flexion exercises like sit-ups impose excessive compressive forces on deconditioned lumbar discs. Anti-movement exercises, by contrast, train your muscles to maintain a neutral spine against external forces.
Anti-Extension: The Dead Bug
The dead bug is one of the safest and most effective tools for teaching your anterior core to resist hyperextending at the lower back.
Lie on your back with your arms reaching straight toward the ceiling, directly over your shoulders. Bring your hips and knees to ninety-degree angles, creating a tabletop position with your shins parallel to the floor. Flatten your lower back against the mat so there is zero gap beneath your spine.
Inhale, and as you exhale, brace your midsection and slowly lower your right arm overhead while simultaneously extending your left leg straight out toward the floor. Only lower your limbs as far as you can without letting your lower back peel away from the floor. Pause for one second, contract your abdominals, and return to the starting position. Alternate sides smoothly for six to eight controlled repetitions per side. If your back arches, you have moved past your current threshold of stability.
Anti-Rotation: The Bird-Dog
While the dead bug targets the front of your cylinder, the bird-dog balances the system by engaging the posterior chain, challenging your ability to resist torso twisting.
Position yourself on all fours with your hands stacked directly beneath your shoulders and your knees under your hips. Find a neutral spine—neither excessively rounded nor heavily arched. Form a stiff brace through your torso.
Slowly reach your right arm forward and your left leg straight back until both are parallel to the ground. Crucially, do not kick your leg high into the air, as this causes the lower back to arch and compress. Instead, drive backward through your heel as if stamping a footprint onto the wall behind you. Keep your hips level; imagine balancing a cup of hot water on your lower back. Hold the extended position for three deliberate seconds, return to all fours without shifting your weight dramatically, and switch sides. Perform five slow, focused holds per side.
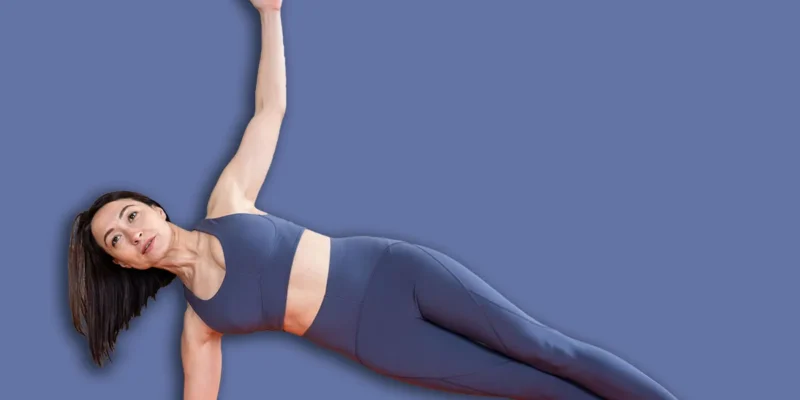
Anti-Lateral Flexion: The Modified Side Plank
Resisting sideways bending protects the quadratus lumborum and fires the lateral abdominal wall, particularly the internal and external obliques.
Lie on your right side with your elbow directly beneath your right shoulder and your forearm flat on the ground. Bend your knees to a ninety-degree angle, stacking your legs directly on top of each other. Push through your elbow and the side of your bottom knee, elevating your hips until your body forms a straight line from your knees to your head.
Avoid letting your hips sag toward the floor or rolling your top shoulder forward. Squeeze your right glute firmly and maintain your abdominal brace. Hold this position for fifteen to twenty seconds while breathing steadily, then lower under control and switch sides. As your endurance builds over several weeks, you can advance to a full side plank with legs extended straight.
Phase 3: Integrating the Hips and Posterior Chain
A strong core cannot function in isolation from the pelvic girdle. If your glutes remain inactive, your core will continually collapse under real-world movement demands. Phase three bridges the gap between static floor exercises and integrated, multi-joint movement.
The Glute Bridge with Core Lock
The glute bridge restores hip extension, pulling the pelvis out of anterior tilt and relieving tension across the front of the hip capsules.
Lie on your back with your knees bent and feet flat on the floor, about six inches from your glutes. Before moving your hips, establish your abdominal brace to lock your ribcage and pelvis together. Drive downward through your heels, lifting your hips toward the ceiling until your thighs and torso form a straight diagonal line.
The critical cue here is to stop lifting before your lower back arches. The elevation should come purely from your hip joints and the contraction of your glutes, not from hyperextending your lumbar spine. Squeeze your glutes tightly at the top for two seconds, then lower down with control. Aim for three sets of ten to twelve repetitions.
The Hip Hinge Pattern
Once you can bridge on the floor, you must translate that pelvic control to standing. The hip hinge is the mechanical foundation of safe bending, lifting, and athletic power.
Stand tall with feet hip-width apart and soft knees. Place your hands on the creases of your hips. Maintain a proud chest and an engaged, braced core. Instead of squatting down by bending your knees forward, push your hips straight backward toward the wall behind you, allowing your torso to tilt forward naturally while your spine stays completely straight.
Your shins should remain nearly vertical throughout the movement. You should feel tension loading into your hamstrings and glutes, not pressure in your lower back. Once your hips cannot travel any further back without rounding your spine, squeeze your glutes and drive your hips forward to return to a tall, neutral standing position.
Phase 4: Developing Upright, Real-World Strength
The final step in reversing the effects of a sedentary lifestyle is standing up and loading your core against gravity. While floor exercises rebuild neural pathways, your body ultimately needs to stabilize while carrying weight and navigating space.
Loaded Carries
Carrying variations are among the most functional, low-risk methods for developing unbreakable core endurance. They demand that your entire abdominal cylinder brace against shifting, dynamic forces with every step you take.
Begin with the suitcase carry. Pick up a moderately heavy kettlebell or dumbbell in one hand, letting it hang naturally at your side. Stand completely upright, actively resisting the weight’s tendency to pull your torso into a sideways tilt. Square your shoulders, lock in your 360-degree brace, and walk forward in a slow, measured line for thirty to forty paces.
Turn around, switch the weight to the opposite hand, and repeat. Your body should look indistinguishable from someone walking without any weight at all. This unilateral load heavily recruits the opposite-side obliques, quadratus lumborum, and deep hip stabilizers to maintain an upright, neutral carriage.
Upright Postural Awareness Throughout the Day
No twenty-minute daily exercise routine can completely counteract ten hours of collapsed sitting if your everyday postural habits remain unchanged. You must integrate your newly developed stability into ordinary tasks.
When seated at your desk, avoid perching on the edge of your seat with an arched back or slumping into a rounded C-shape. Sit all the way back against the chair’s lumbar support, place your feet flat on the floor, and imagine growing an inch taller through the crown of your head. Every forty-five minutes, stand up, take three deep diaphragmatic breaths, perform a brief standing glute squeeze, and reset your baseline alignment.
Critical Mistakes to Avoid When Rebuilding
Progressing too quickly or choosing the wrong exercises can set your recovery back significantly. Avoiding common missteps is just as vital as doing the work correctly.
Do not rush into ballistic movements, high-repetition spinal flexion, or complex rotational exercises. Sit-ups, hanging leg raises, and rapid Russian twists impose high compressive loads on deconditioned spinal discs and tend to rely heavily on overactive hip flexors rather than the deep core.
Do not judge the quality of a core workout by the intensity of the abdominal burn. A burning sensation usually indicates fatigue in superficial muscles, not proper stabilization of deep structures. Your goal is structural integrity, precise motor control, and movement efficiency.
Never compromise form for arbitrary benchmarks. Holding a shaking, sagging plank for sixty seconds does nothing to build functional core strength; it merely trains your nervous system to rely on passive joint structures, ligaments, and lower back muscles when your stabilizers fail. Ten seconds of pristine, high-tension stability will always yield superior results compared to a minute of sloppy compensation.
Rebuilding a deconditioned core is fundamentally an exercise in structural patience. You are not simply building muscle tissue; you are rewiring neuromuscular patterns that have laid dormant through months or years of immobility. By prioritizing breath mechanics, mastering anti-movement stability, and progressively challenging your posture against real-world loads, you build a resilient physical foundation that protects your back, restores effortless movement, and supports lifelong physical capability.
What is your reaction?
Excited
0
Happy
0
In Love
0
Not Sure
0
Silly
0